
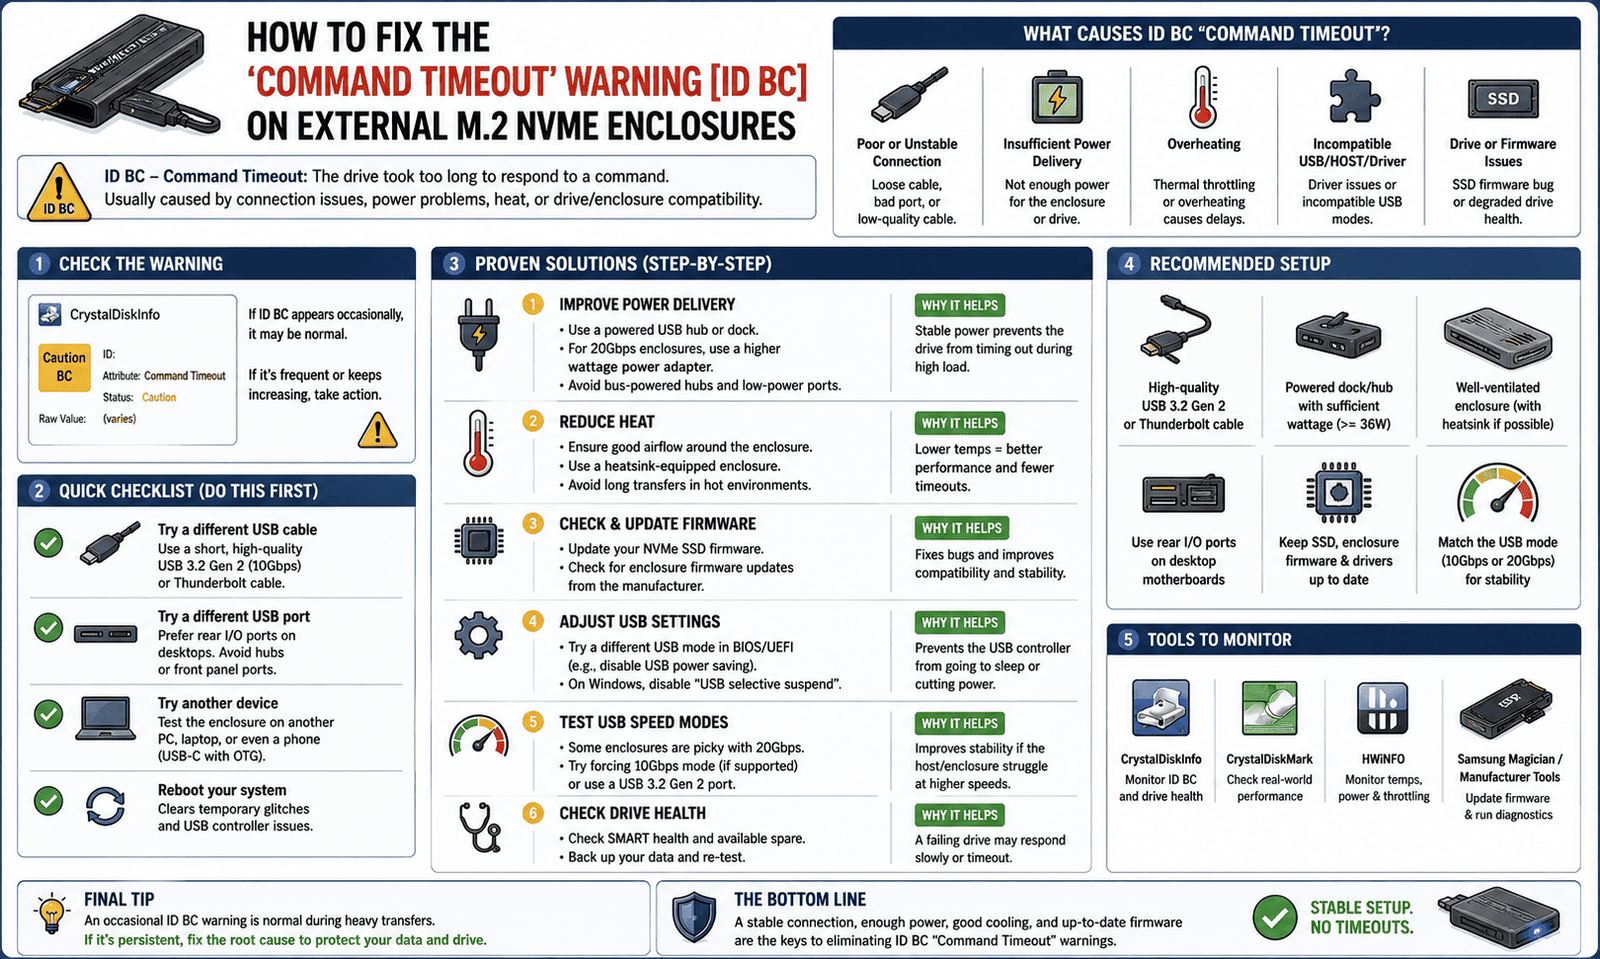
How to Fix the ‘Command Timeout’ Warning [ID BC] on External M.2 NVMe Enclosures
You bought a high-speed M.2 NVMe drive, popped it into a sleek aluminum external USB4 or Thunderbolt enclosure, and created the ultimate portable drive for your laptop. But after a few weeks of use, you notice the drive occasionally stutters during file transfers. You open CrystalDiskInfo, and your heart drops: a yellow “Caution” warning is flashing next to ID BC: Command Timeout.
If you look up generic hard drive guides, they will tell you that a Command Timeout error means your drive is physically dying and you need to throw it away.
Stop right there. When it comes to external NVMe enclosures, this error is rarely a sign of a dying SSD. Instead, it is a classic symptom of a communication breakdown across your USB cable. Here is the plain-English breakdown of why this happens and how to fix it in minutes.
What Actually is a “Command Timeout”?
Think of your computer as a boss and your SSD as an employee. The computer sends an instruction (like “Write this 10GB video file”), and it expects the SSD to complete the task and report back within a strict time limit (usually a few milliseconds).
A Command Timeout happens when the SSD takes too long to respond, causing the computer to give up, cancel the operation, and try again. CrystalDiskInfo reads this tally from the S.M.A.R.T. logs, and if the raw value climbs above zero, it flags the drive with a yellow warning.
When a drive is plugged directly into a motherboard, a timeout usually means the flash controller is physically failing. But when a drive is inside an external enclosure, the data has to pass through a complex chain:
[ Motherboard Port ] ──> [ USB/Thunderbolt Cable ] ──> [ Enclosure Bridge Chip ] ──> [ SSD Controller ]
If any link in that chain drops power or drops a data packet for a split second, the command times out. The SSD itself is perfectly healthy; it just never got the message.
Step 1: The Quick Hardware Audit (The True Fixes)
Before messing with deep Windows software settings, we need to address the physical bottlenecks that trigger 90% of external enclosure timeouts.
1. Ditch the Long or Cheap Cables
High-speed NVMe data transfers require massive electrical bandwidth. If you are using a random, thin USB-C cable you found in a drawer (like a phone charging cable), it cannot handle the data load. The cable will drop packets, causing the drive to hang and time out.
-
The Fix: Always use the short, thick cable that came with the enclosure. If you need a replacement, ensure it is officially rated for USB4, Thunderbolt 3/4, or at least USB 3.2 Gen 2 (10Gbps). Keep the cable under 3 feet (1 meter) for maximum signal stability.
2. Stop Using Front-Panel USB Hubs
Plugging your enclosure into a cheap USB hub, a monitor passthrough, or the front panel of a desktop case is a recipe for timeouts. These ports split power among multiple devices and use long internal cables that degrade the signal.
-
The Fix: Plug the enclosure directly into the back of your motherboard (for desktops) or the main integrated Thunderbolt/USB-C ports (for laptops). This ensures the enclosure gets a full, stable 5V/9V power delivery.
Step 2: The Software Fixes (Fixing Disconnections)
If your hardware is solid but you are still racking up Command Timeouts, Windows is likely putting your USB ports to sleep to save power, cutting off the drive mid-transfer.
Fix A: Disable USB Selective Suspend
Windows tries to be energy-efficient by cutting power to USB ports it thinks are idle. However, it often misjudges external NVMe drives during background tasks, causing them to sleep, wake up sluggishly, and log a timeout.
-
Press the Windows Key, type Edit Power Plan, and hit Enter.
-
Click on Change advanced power settings.
-
Scroll down and expand USB settings > USB selective suspend setting.
-
Change the setting to Disabled for both “On battery” and “Plugged in,” then click Apply.
Fix B: Disable Power Management in Device Manager
Let’s make sure the specific controller chip operating your USB link stays awake permanently.
-
Right-click the Windows Start button and open Device Manager.
-
Expand the Universal Serial Bus controllers section.
-
Right-click your high-speed USB Controller (or USB Root Hub) and select Properties.
-
Navigate to the Power Management tab.
-
Uncheck the box that says “Allow the computer to turn off this device to save power,” then click OK.
How to Clear the ‘Caution’ Status in CrystalDiskInfo
Once you have replaced the cable or fixed your power settings, you might notice the yellow warning status remains. This is because the Command Timeout count is a historical log—it tells you what happened in the past, even if the issue is solved now.
If you have verified that your file transfers are smooth and the raw value has stopped increasing, you can manually reset the warning threshold so your dashboard returns to a beautiful, clean blue “Good” status:
-
Open CrystalDiskInfo.
-
Go to Function > Health Status Setting.
-
Locate the slider for [BC] Command Timeout.
-
Move the warning threshold slider slightly to the right so it sits just above your current raw error count.
-
Click Apply.
Monitor the drive over the next few days. If the status stays blue, your communication issue is completely resolved! If the raw value continues to skyrocket despite fixing the cable and ports, only then should you suspect internal drive degradation and start backing up your files.